This tutorial covers running the MuSHR multi-agent navigation stack in simulation
Advanced Tutorial | Expected duration is 30 minutes
By: Sidharth Talia
Introduction
A navigation system enables a robot to move quickly between different poses while avoiding collisions with the environment or other agents. The navigation system in this project uses a slightly modified version of the NH-TTC system. It is a decentralized, multi-agent navigation system that considers the Non-holonomic constraints of the car and the time to collision when finding the optimal control actions. To learn more about how it works, check out the paper here!
Goal
The goal of this tutorial is to get the multi-agent navigation system up and running on your computer.
Requirements
Completed the quickstart tutorial (familiarity with ROS and python is assumed). Make sure you’re using the sandbox map. The quickstart tutorial explains how to change the map.
Environment setup
Clone the nhttc_ros repository into your catkin workspace:
$ cd catkin_ws/src
$ git clone --branch devel https://github.com/prl-mushr/nhttc_ros
$ cd nhttc_ros
$ git submodule init
$ git submodule update --recursive
Install python requirements:
$ cd ~/catkin_ws/src/nhttc_ros
$ pip install -r requirements.txt
Compile using catkin_make:
$ cd ~/catkin_ws
$ catkin_make
Running the example:
After everything compiles, you should be ready to try out the simulation example. Launch the nhttc_demo.launch with the following command:
$ roslaunch nhttc_ros nhttc_demo.launchWait till you see the following text on the terminal (you may see a few extra lines):
[ INFO] [1621678112.116392844]: node started
[ INFO] [1621678112.116614789]: carrot_goal_ratio: 1.000000
[ INFO] [1621678112.116632550]: max_ttc: 6.000000
[ INFO] [1621678112.116642780]: solver_time: 20
[ INFO] [1621678112.116653036]: obey_time:1
In a new tab of the terminal (use Ctrl + Shift + T), open rviz:
$ rviz -d ~/catkin_ws/src/nhttc_ros/rviz/nhttc.rvizIn another new tab, run the route publisher script:
$ rosrun nhttc_ros route_publisherYou should see something like this on rviz:
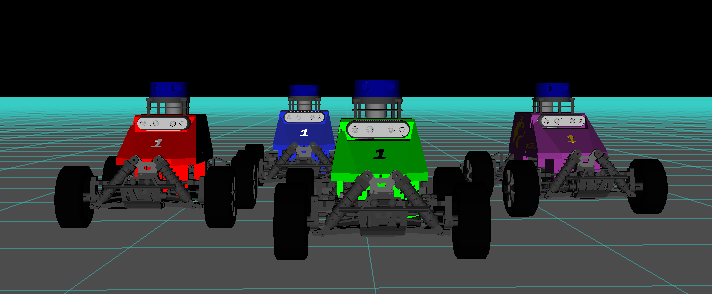
This should be considered the default case henceforth. In this demo, the blue car is trying to follow the blue arrows and the green car is trying to follow the green arrows. The green car is supposed to stop a small distance after crossing the intersection of the two paths whereas the blue car is supposed to move towards the top after the intersection of the two paths. The two paths coincide to force the navigation system to display its capabilities. Note that you may observe slightly different behaviour when you launch this on your system, the provided gif is only for reference.
Note: In order to rerun this example you must close all the processes we started here and follow the steps from the beginning of this section.
Using the wrapper for your own intents and purposes:
The system takes a set of waypoints rather than a single goal point. The message to publish for this is:/car_name/waypoints of type: geometry_msgs/PoseArray. Note that “car_name” refers to the name of the car, such as car1, car2, and so on. The waypoint can also contain just one waypoint, so it is possible to test the system with single waypoints if you prefer that. The reason why taking an array is preferred is so that the waypoint management code doesn’t have to be written by you (user). You simply pass the set of the waypoints in and the navigation sytem takes care of managing them on it’s own.
The z axis coordinate represents the time difference between 2 waypoints. Note that a z axis value of 0.001 equals a time difference of 1 unit. This is done so that the waypoints don’t look like they’re floating off the ground when visualized in rviz. The unit of time is equal to the time it takes for the car to cover the distance between two waypoints in a straight line at the rated speed. The reason for this is to allow the system’s speed to be scaled up or down without changing the global plan’s timing itself.
To adjust the number of cars used, their colors and so on, you can modify the launch file (or create your own launch file using the ones provided as a template). For instance, if you wish to add another car, simply add these lines to the launch file:
<group ns="car_name">
    <include file="$(find mushr_sim)/launch/single_car.launch" > <!-- this launches the car itself -->
        <arg name="car_name" value="car_name"/>  <!-- this sets the prefix for the topis used by this car -->
        <arg name="racecar_version" value="racecar-uw-nano"/> <!-- this sets the type of car (wheelbase, vesc parameters and rendering) -->
        <arg name="racecar_color" value="-red-white" />  <!-- this sets the color of the car -->
    </include>
    <node pkg="nhttc_ros" type="nhttc_ros_node" name="controller3"> <!-- this launches the nhttc node for this car -->
        <param name="car_name" value="car_name"/> <!-- this tells the node the name of the car it will control -->
    </node>
</group>
By default, the nhttc_pose_init script is used for initializing the poses of the cars. It places the cars in a particular pattern (right now, the cars sit on the circumference of an ellipse). If there are 2 cars, they will be kept 180 degrees apart as in the default case. If there are 3 cars, they will be kept 120 degrees apart. This script is only used to make adding agents as simple as copy pasting some lines in the launch files.
If you want to set the initial pose to be something else, all you have to do is publish to the initial pose to the topic:/car_name/initial_pose of type: geometry_msgs/PoseWithCovarianceStamped where car_name corresponds to the name of the car. Note that this is the “2D pose estimate” in rviz and can also be set through rviz through the conventional approach.
Furthermore, the route_publisher.py file used for the demo only publishes paths for two cars (car1 and car2). This script is hardcoded to publish paths only for two agents. If you wish to add another car, you will have to create your own route-publisher to publish a route for the third car. You can use the route_publisher.py file as a reference or edit it to your liking.
Tuning the parameters
The multi-agent navigation system can work out of the box for most applications, however, it is possible to tune it. The parameters can be changed inside the yaml config file, in this case, the nhttc_demo.yaml. The navigation system uses a solver which has some level of stochasticity to it, which can lead to slightly different behavior. The demonstrations shown here are to explain the effect of changing the parameters and do not indicate the exact performance. Also note that there may be additional parameters besides the ones specified here. Those are experimental and should be set to false or left as is by the user.
carrot_goal_ratio: 1.0
max_ttc: 6.0
solver_time: 20
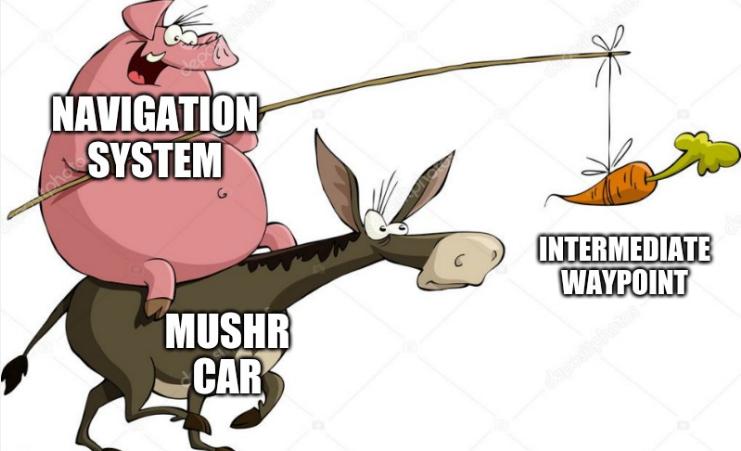
obey_time: true1) carrot_goal_ratio: The ROS wrapper implements a carrot-goal navigation system where waypoints are selected from a prescribed path. The waypoints are selected such that they are some “lookahead” distance away from the car. Keeping the car aimed at a waypoint farther away prevents it from getting stuck in a local minimum. Keeping this lookahead closer to the car makes sure the car does not deviate too far away from the prescribed path while getting to the point farther down the line. The ratio of this lookahead distance or carrot-goal distance to the turning radius has been defined as the carrot-goal ratio. The reason for that name is that the way the system works is akin to a donkey(MuSHR car) trying to eat a carrot(waypoint) hung from a stick that you(navigation system) are holding while sitting on top of it. The donkey moves where the carrot goes but can never actually reach it:
A value of 1.0 means the carrot goal distance is the same as the turning radius. A value of 2 indicates that the carrot goal distance is twice the turning radius. larger numbers result in smoother navigation, however, they come with the drawback of greater path-deviation as the system will tend to “round off” corners a lot sooner. The first figure shows the performance with carrot-goal-ratio of 1.0, and the second figure shows performance with a ratio of 1.5:
If the car tends to get stuck around turns, increase the carrot-goal ratio in increments of 0.1. If the car appears to be rounding off the turns too soon or significantly deviating from the path near turns, causing issues with other agents, reduce the carrot-goal-ratio in decrements of 0.1.
2) max_ttc: Stands for maximum time to collision. This parameter decides which agents to consider and which to not consider when optimizing for the next control action. The time to collision is calculated using the current state (pose as well as twist) of all agents. A larger max_ttc results in a larger time horizon for considering potential collisions. A larger max_ttc will make the car respond earlier to other agents but can result in the car deviating from its path too early. A smaller max_ttc will make the car less sensitive to agents far away but may result in the car responding too late and ending up in deadlocks more often. The first figure shows the performance with a max_ttc of 3.0 and the second shows the performance with max_ttc of 6.0 seconds. Notice how the cars start avoiding each other earlier in the second example.
In this particular example, it may appear to be helping the agents. However, had there been another agent above/below these agents, it may have affected the performance adversely.
3) solver_time: The amount of time in milliseconds to be used for calculating the solution. It is not to be confused with the time to a collision. Increasing the solution time may lead to a better solution, however, as the system has to operate in real-time, this will reduce the control-loop frequency. A slower control-loop frequency results in a delayed response. A multi-agent navigation system responds to the actions of the agents around it. If the control loop is slower, the other agents may appear out of sync at times as they aren’t running the control loop fast enough to respond to each other’s actions. In multi-agent situations when the intent of the other agent isn’t clear, all the agents are essentially guessing what they should do. If the first guess is wrong, it may lead to sub-optimal behavior. In the following figures, the solution time is 20 milliseconds for the first case and 30 milliseconds for the second. Notice how the blue car takes the wrong course of action initially in the second case.
At the same time, reducing the solution time may lead to the solution not converging at all, again, leading to sub-optimal solutions. Keeping the solution time between 15-30 milliseconds will yield feasible solutions, with larger times resulting in the above behavior appearing more often.
4) obey_time: The navigation system generally takes a waypoint array from a global planner. In multi-agent systems, the global planner will specify both space and time coordinates, as in, where the agent is supposed to be and when it is supposed to be there. If this parameter is set to false (as in the default demo), the car will disregard the timing. The first figure shows the behaviour for when this parameter is set to “false” and the second shows what happens when it is set to “true”:
As you can see, the blue car stops at the turn for a while before continuing. This happens because the blue car rounded the turn and arrived a little too early at the next waypoint. It therefore slowed down before continuing in order to maintain the timing.
Additional parameters like “allow_reverse”, “adaptive_lookahead” and “safety_radius” can be considered as “extra” or “experimental”. Allow_reverse sets whether the cars are allowed to go in reverse or not. It is set to true by default. Setting it to false may or may not cause issues with navigation. Adaptive_lookahead skips waypoints if they’re not reachable, this can help the system deal with global planners that provide unreasonable trajectories. The downside is that sometimes it may skip waypoints you do want to pass through. Last but not the least, the safety_radius is like an air-cushion around the car. A safety radius of 0 is not recommended, as localization errors in the real world may cause you to bump into other agents. For the MuSHR car, keep the safety radius as 0.1 + whatever the uncertainty of your localization system is.
Troubleshooting
- the multi_teleop.launch or nhttc_demo.launch node crashes when rviz is started: Wait for all the cars to initialize first before starting rviz. This usually takes about 5-10 seconds and a little longer if launching for the first time after boot.