Initialize and operate MuSHRs out-of-the-box autonomous navigation stack!
Intermediate Tutorial | Expected duration is 30 minutes
By: Markus Schiffer & Sidharth Talia
Introduction
Goal
This tutorial will teach you how to set up and operate MuSHR’s baseline autonomous navigation stack. By the end of the tutorial, the car should be able to autonomously navigate around known obstacles on a known map.
Prerequisites
- If in sim, complete the quickstart tutorial
- If on real car, complete the noetic robot software setup tutorial
Note on dependecies:
This tutorial is designed for the python3 ROS noetic image. It assumes that this accounts for any dependencies needed.
If you are operating in simulation and use the particle filter for localization, we do not recommend testing with the sandbox.yaml default map as the localization system struggles in an open environment (all positions look the same!). See the quickstart tutorial for how to change maps.
Navigation Stack Overview
At the highest level MuSHR’s navigation stack consists of three principal components:
Receding Horizon Controller (RHC) Node: This node is responsible for motion planning and generating controls(steering, speed) for the car. The implementation shipped with the car uses a Model Predictive Controller (MPC) to generate control signals which are sent to the car’s motor controller (VESC).
Localization Node: In order for the controller to know where it is, and therefore also whether it is in the proximity of known obstacles in the map, it must know its location. Solving this problem is called “localization”. The Localization Node is implemented using a method called Particle Filtering which relies primarily on a data stream from the laser scanner.
Planner Node This node generates a plan that the RHC controller will follow. The planner does not consider dynamic obstacles when constructing its plan; rather it uses a static map of the environment. It chains the car’s motion primitives together into a plan, using a search algorithm (such as A*).
This tutorial does not cover either the theory or the inner workings of the Model Predictive Control, Particle Filter, and A* search.
Installing the Navigation Stack
Note: The docker container may already have the required packages pre-installed. These instructions have been provided in case you need to reinstall the packages from scratch (for example, you need to reset environment).
If you’re setting up autonomous navigation on the MuSHR car (not just the sim), ensure the on-board computer (either a jetson nano or a jetson Xavier NX) is connected to the internet. You may have to connect your system to a monitor to do this as the default setting is for the on-board computer to act as a hotspot. Once you’ve connected your system to the internet, you’ll need to find the IP address of the car,
On the car’s computer, run the following command:
$ ifconfigFind the inet addr line:
wlp0s20f3 Link encap:Ethernet  HWaddr ABCDCEGFJOSDHOHSOGHOS
          inet addr:192.168.43.254 --> This is the RACECAR_IP
From your desktop/laptop, SSH into your racecar.
$ ssh robot@RACECAR_IPIf you prefer, these steps can also be done with a mouse, keyboard, and monitor plugged into the MuSHR car, using the Ubuntu UI.
IMPORTANT
The reason why there are two planners (mushr_gp and mushr_gprm) is because mushr_gp is too resource intensive to run on the jetson nano 4GB variant. However, if the desktop/laptop computer remains connected and in range of the MuSHR car, you can run mushr_gp on the computer instead since there will be a single ROS master. If you need the planner to run on the jetson nano, we recommend using the mushr_gprm package. For the Jetson Xavier NX or when running on the sim exclusively, mushr_gp will work. Both repositories contain ROS packages that reproduce the desired functionality. You need only concern yourself with each package’s launch files to use them effectively. You can find the launch files in each package’s launch directory.
Starting the navigation stack
We will now launch the navigation stack on the robot. To learn more about effective operation and experimentation strategies with the MuSHR car, visit the workflow tutorial. We suggest using tmux to manage multiple ROSlaunch sessions. tmux allows operating multiple tabs within the same ssh connection.
Starting the docker image:
Note: If you’re operating on the robot, you’ll need to SSH into it. If you’re operating in sim, you can just open a new terminal and skip the tmux related commands.
As we are running the entire system from docker, the first thing to do is to start the docker image. To do this, execute:
$ mushr_noeticOnce you’ve ssh’d into your robot and started the docker image, activate tmux:
$ tmuxThen, to create two vertical panes, type ctrl+b (ctrl and b) then % (or alternatively " to split horizontally). You can use ctrl+b then your left and right arrow keys to switch between windows. We will need four panes for this tutorial on the real car, and three on the simulator.
Note: If the map you are using is very large map (>100x100 meters)–size inclusive of the unknown region–then the controller will be stuck sampling points. Save yourself the headache and shrink/crop your map before you begin. (Gimp is a good tool for this job.
You can navigate tmux panes by typing ctrl+b then [arrow key] (or simply make new terminal tabs and avoid tmux altogether if you’re doing this in sim).
If you’re using seperate tabs instead of tmux, make sure they are all connected to the running docker image. You can do this with the following steps:
First, we need the docker’s CONTAINER ID. Execute the following command:
$ docker psExpected output:
CONTAINER ID   IMAGE                COMMAND   CREATED          STATUS          PORTS     NAMES
189781eba455   mushr/mushr:x86_64   "bash"    52 minutes ago   Up 52 minutes             install_mushr_noetic_run_a85227ee45d5
the CONTAINER ID can now be used to enter the docker from a new tab with the following command:
docker exec -it CONTAINER_ID bash CONTAINER_ID with your container ID.Starting the system
Any autonomy related task will require data from sensors and some way of sending the control commands to the hardware. In addition, manual control may also be required for safety reasons, or for the purposes of generating a map of an area via manual operation of the car. All these basic features are handled by a single launch file called teleop.launch
On the MuSHR car:
$ roslaunch mushr_base teleop.launchNow launch the map_server:
# Make sure mushr/mushr_base/mushr_base/mushr_base/maps has your map
# and mushr_base/launch/includes/map_server.launch is set to your map
$ roslaunch mushr_base map_server.launch
Now, we will launch the localization node:
$ roslaunch mushr_pf real.launch$ Vesc callback called for first time....
$ Initialization completeThen activate the RHC node,
$ roslaunch mushr_rhc real.launchWait for the code to initialize
MPC
Control Node Initialized
Finally, launch the global planner node (use the planner appropriate for your system):
$ roslaunch mushr_gp real.launch$ roslaunch mushr_gprm real.launchWait for it to initialize:
[ INFO] [1658309032.479218601]: Planner ROS node constructed. Need to initialize state
[ INFO] [1658309032.644907822]: Resizing the map
[ INFO] [1658309033.229219658]: Environment initialized
[ INFO] [1658309033.261994212]: Updated costmap[INFO] [1682118850.989244]: Complete planner initialization.
[INFO] [1682118864.474129]: Constructing roadmap...
Vertices: XXX
Edges: XXXXX
[INFO] [1682118871.115012]: Roadmap constructed in 6.60sIn simulation:
When running in simulation, the steps are more or less the same as those for the real car, with the difference being that
- We use the mushr_sim package to start the
teleop.launch - Absence of the particle filter (not necessary in simulation)
- Differences in the names of the launch files (instead of
real.launchwe usesim.launch)
$ roslaunch mushr_sim teleop.launchThen activate the RHC node,
$ roslaunch mushr_rhc sim.launchWait for the code to initialize
MPC
Control Node Initialized
Finally, launch the global planner node (use the planner appropriate for your system):
$ roslaunch mushr_gp sim.launch$ roslaunch mushr_gprm sim.launchWait for it to initialize:
[ INFO] [1658309032.479218601]: Planner ROS node constructed. Need to initialize state
[ INFO] [1658309032.644907822]: Resizing the map
[ INFO] [1658309033.229219658]: Environment initialized
[ INFO] [1658309033.261994212]: Updated costmap[INFO] [1682118850.989244]: Complete planner initialization.
[INFO] [1682118864.474129]: Constructing roadmap...
Vertices: XXX
Edges: XXXXX
[INFO] [1682118871.115012]: Roadmap constructed in 6.60sRunning the navigation stack
To operate the navigation stack, we will use foxglove to send pose targets to the vehicle. The quickstart tutorial tutorial goes over how to use foxglove with the MuSHR stack. When operating in the real world, the pose estimate of the car may be incorrect. You can correct this by providing the particle filter with the correct pose estimate using the Set Pose Estimate button on the bottom right of the foxglove window and then using the button to publish clicked points.
Note: When publishing a pose, the pose will correspond to the pose at the tip of the arrow and not the base of the arrow. Set the pose accordingly.
Note: Sometimes Foxglove might not show certain ROS topics (for example, the path published by the global planner) because these topics are hidden initially. To unhide them, press the gear icon at the top right of the 3D window (the one in the middle that shows the map/robot), and then in the topics dropdown, press the closed eye button (or open eye button if you want to rehide them).
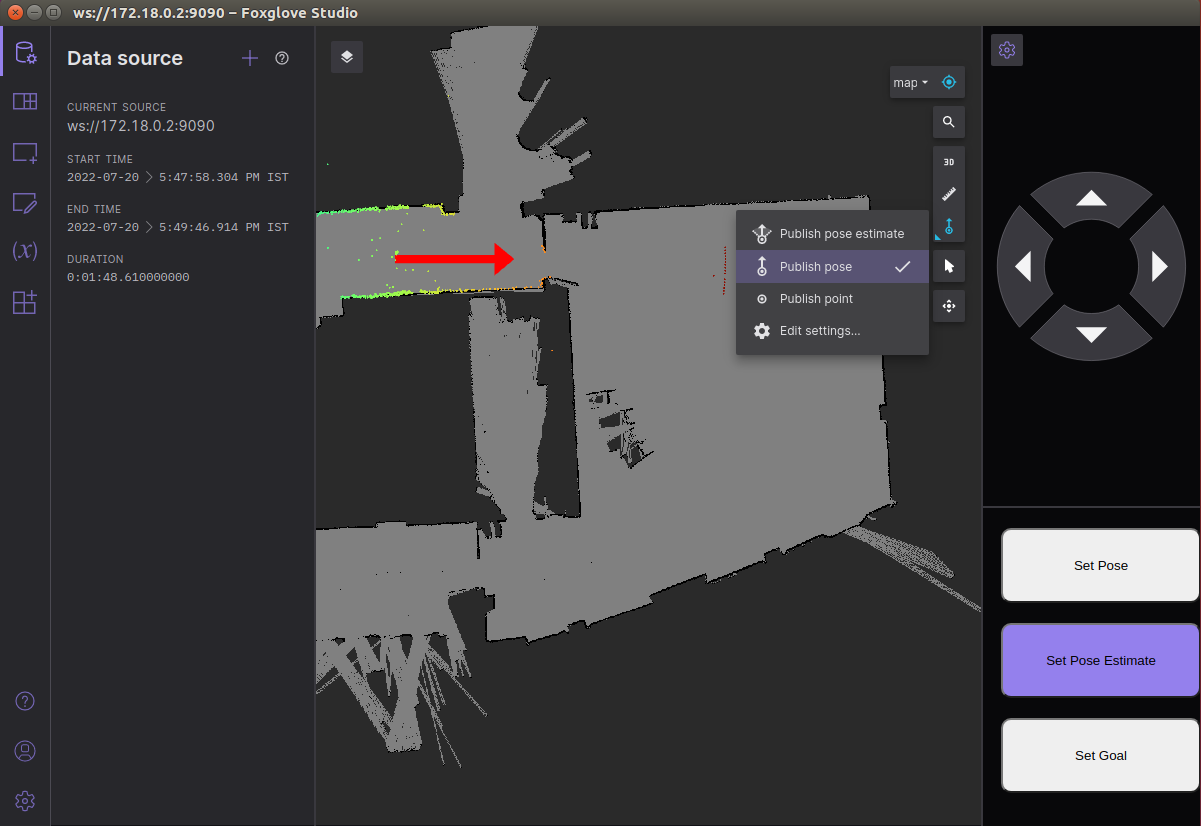
In simulation, you may want to set the starting pose of the car at a certain point. To do this, click the Set Pose button on the bottom right of the foxglove window and use “Publish point” to publish a point or “Publish Pose” to publish a pose for the car.:

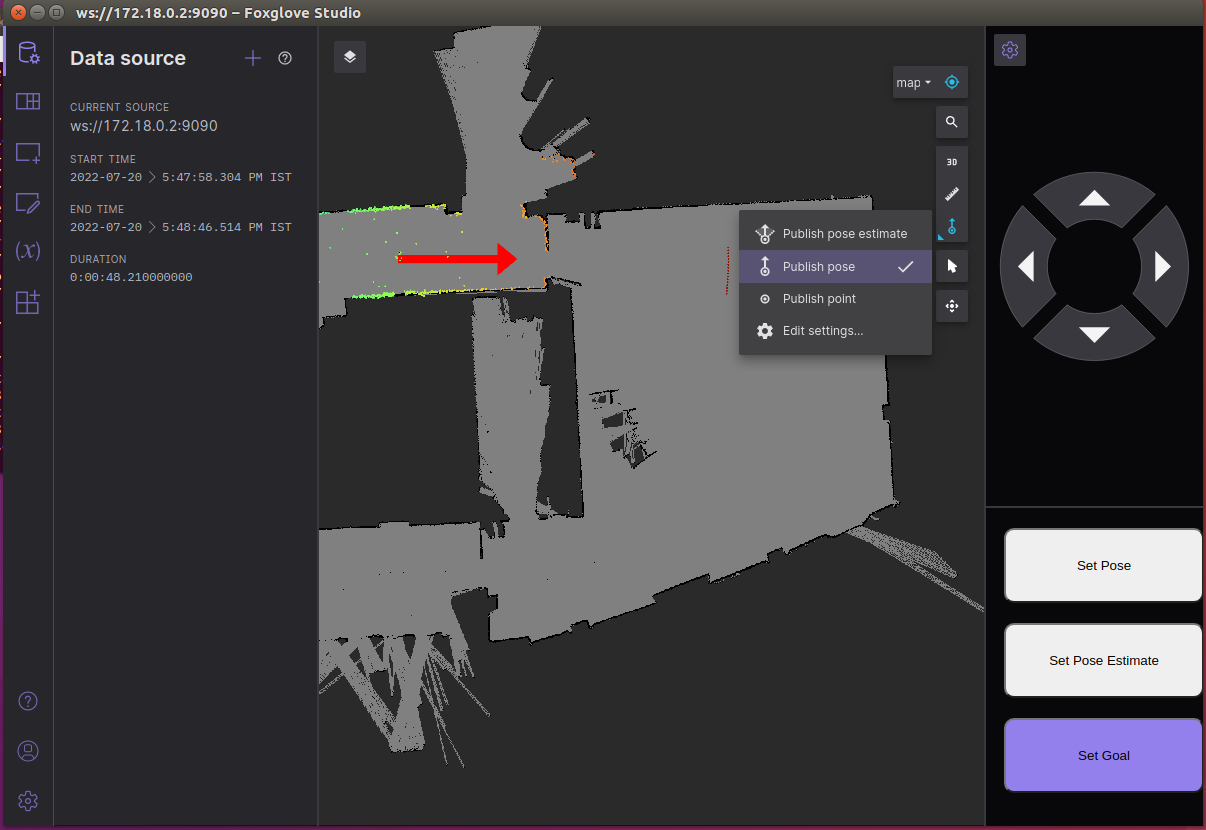
To set a pose target, click on ‘Set Goal’ button on the bottom right of the foxglove window and use “Publish pose” to publish a goal pose for the car:
The following video demonstrates the process of starting and running the stack in sim. In the real world, the difference would be the launch files being executed, and possibly the requirement to set the initial pose estimate.
That’s it, now you have basic autonomous navigation!