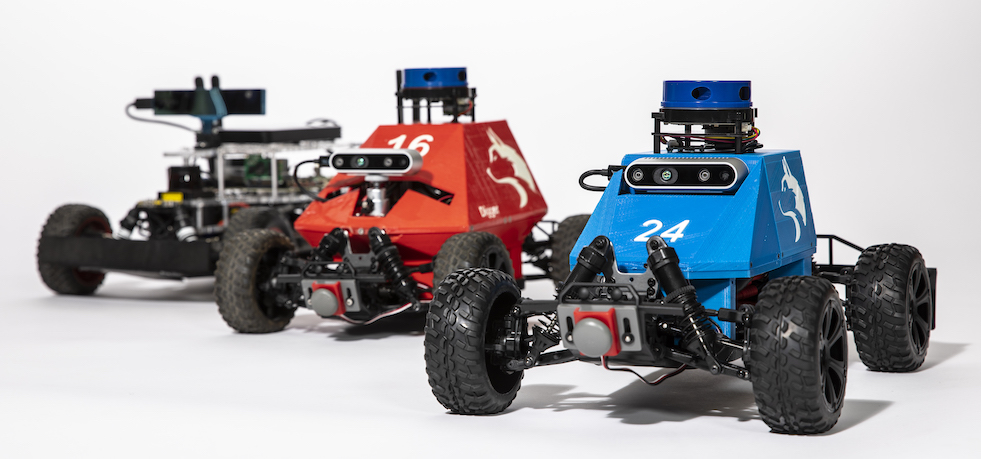
Get software installed and the car running
Beginner Tutorial | Expected duration is 30 - 60 minutes
By: Matt Schmittle
Introduction
This tutorial will get your car up and running teleoperation.
Goal
To get you driving your car around in teleop.
Requirements
The following are required before continuing with installing the necessary libraries.
- SD card flashed with the NVIDIA Jetpack image. We recommend using Balena Etcher to flash your SD card with the linked Jetpack image.
- A way to connect the computer to internet (either WiFi or ethernet)
- Monitor, HDMI cable, mouse, keyboard
Booting Up
Power on and boot the Jetson. Make sure your sd card is plugged into your Jetson Nano and flush, this should be done from the hardware tutorial. If you have an AC to 5V power adapter you can plug that into the barrel connector on the USB port side of the Jetson Nano. If not, place a battery in the right side of the car and plug the connector into the matching connector going into the top half of the car. Plug in the right angled barrel connector into the Jetson Nano. The green light on the right side should turn on. The correct configuration is shown below. For initial setup you will need to plug a monitor, keyboard, and mouse into the car. The keyboard/mouse can go in any of the USB ports, intial setup does not require the sensors to be connected.
Everything plugged in correctly. Notice the barrel connector in the top right, the battery in the right slot, and the green light in the top left.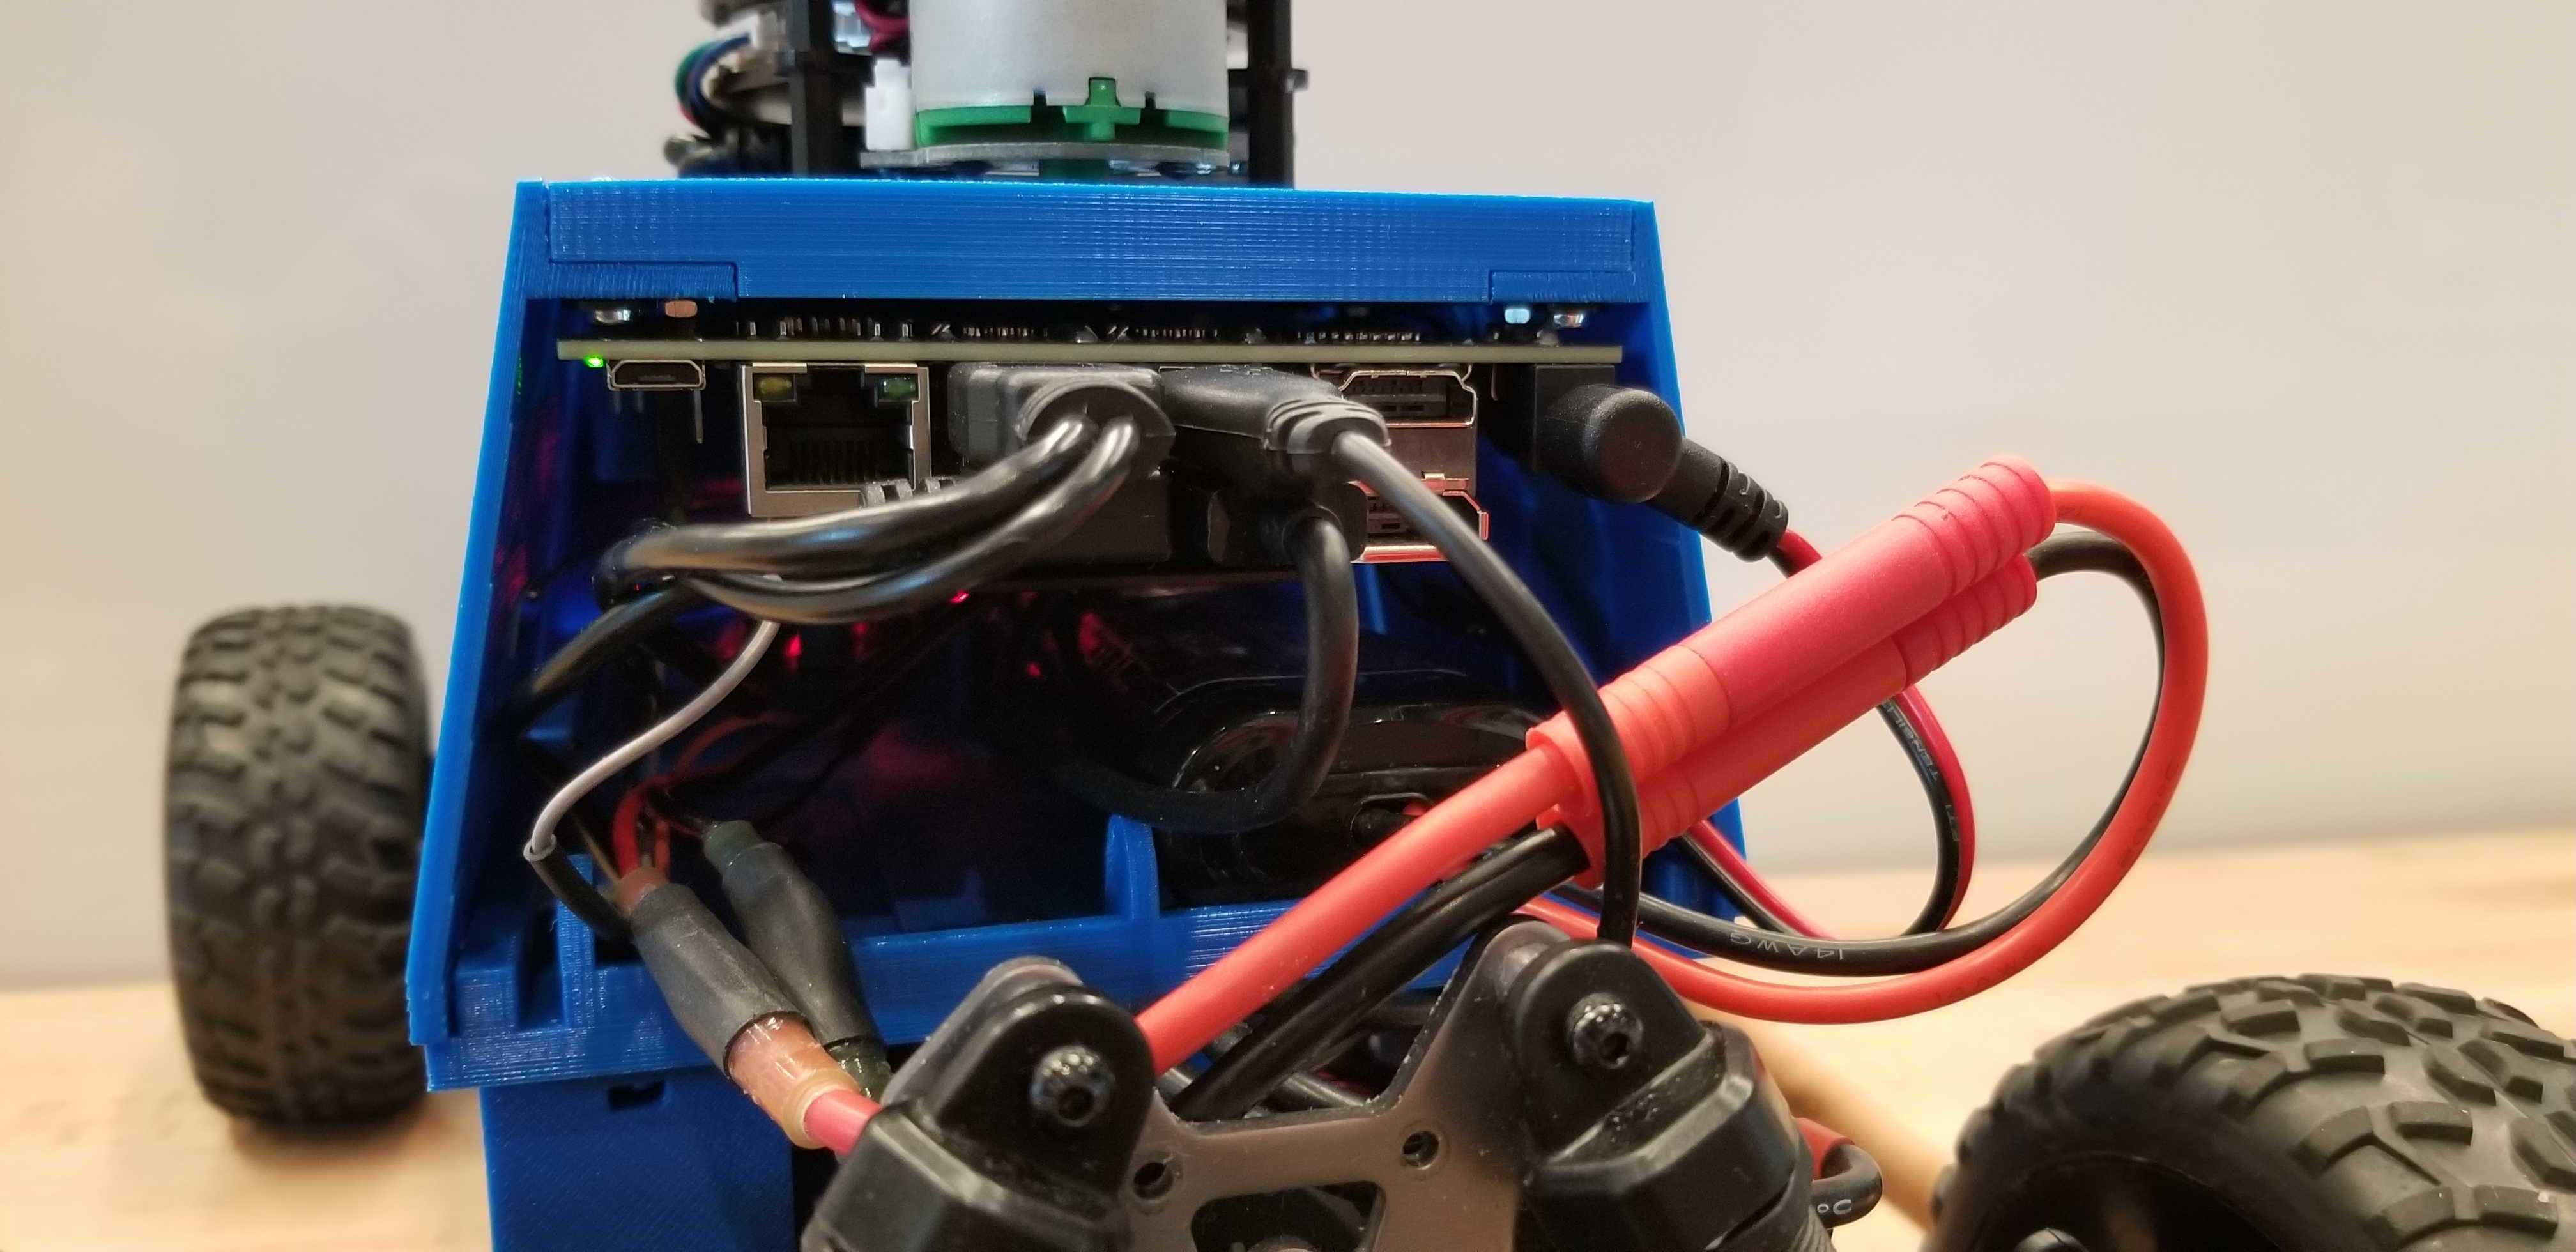
Username: robot
Name: robot
Computer Name: goose
Setup Wi-Fi
If you want to install additional software on the car, or be able to use the internet on your laptop while connected to the car then you will want to set the car up with a static IP. A static IP is a IP address (think postal address but for talking between computers) that does not change each time you connect to wifi. Most computers do not have a static IP, but for regularly connecting to the robot we do not want the robot’s IP to change.
Once logged in, use the mouse to click on the Wi-Fi icon in the top right and click “Edit Connections” to open the network manager. Connect to the network that the robot should have a static IP on.
Highlight the connection that corresponds to the network the robot should be connected to and click Edit... or the gear icon.
Click on the General tab and check that Automatically connect to this network when it is available and All users may connect to this network are enabled.
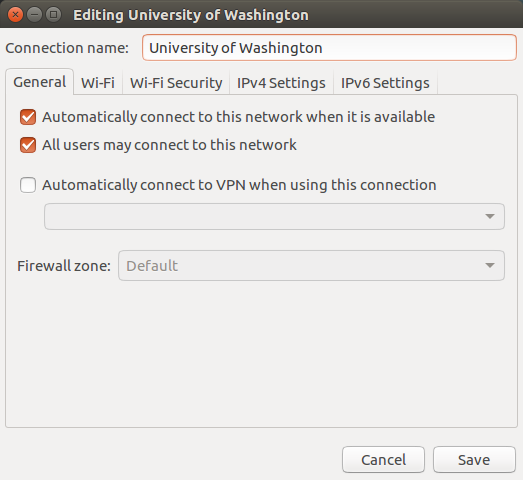
General tab with auto connect set
Click on the Wi-Fi tab. Make sure that the SSID: field is set to be the name of the network that the robot will have a static IP on. In the example image, it is University of Washington. Make sure that the Mode: dropdown is set to Client. In the Device: dropdown, choose the last option.
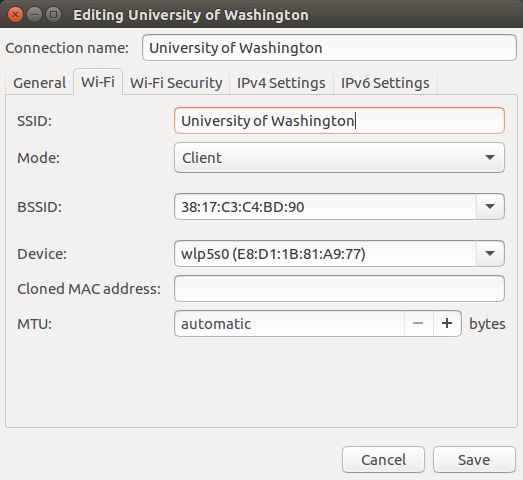
Wi-Fi tab with BSSID and SSID set
Click on the IPv4 Settings tab. Set the following fields:
- Method: dropdown to be Manual.
- Click Add. Under Address, enter:
- The Static IP: for example
172.16.77.Z.Zis usually the robot number on the car, but it’s up to you! - Netmask:
255.255.255.0. - Gateway:
172.16.77.100.
- The Static IP: for example
- DNS servers: field, enter
8.8.8.8.
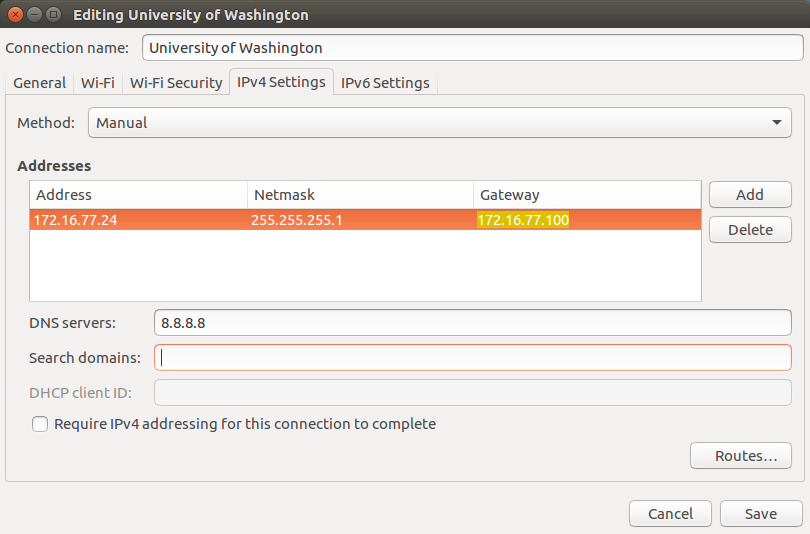
IPv4 tab with an example IP setup
Click the Save button and close the connection editor.
Reboot the Nano.
After the Jetson reboots, verify that the robot has obtained the expected static ip.
$ ifconfigSSH from another Computer
Once the Nano has fully booted, it will connect to the existing network at the specified static ip. You should then be able to ssh into it (with a separate computer on the same network) with the static IP you set earlier.
$ ssh robot@172.16.77.ZTroubleshooting WiFi
ifconfig Output Not What Expected
IP addresses 172, 192, and 10 are all private IPV4 addresses. If your ifconig output displays one of these instead of the exact one you typed, please try the SSH step. If you can SSH into the car, no need to worry about this step! Otherwise, try deleting the wifi connection and making a new with the correct settings.
Can’t SSH
One issue that might arise on your robot is that even though it is connected to a wifi network, you cannot ssh into the car or view websites from the browser built into the car. This can occur if the date/time of your car is very different from the real time. Try manually setting the date/time and once you verify that the internet is working, you can switch back to automatic date/time mode.
Connect the bluetooth controller
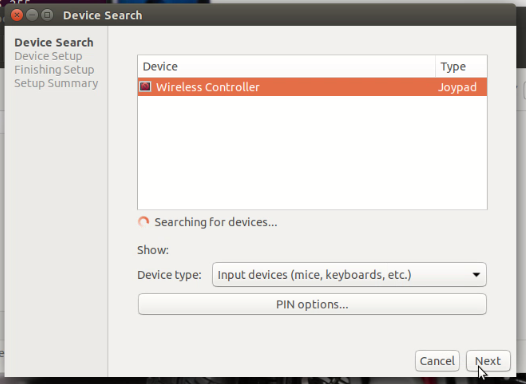
Note the column of icons on the left-side of the Ubuntu GUI. Click on the uppermost one, and type Bluetooth. Use the search result to open the Bluetooth dialog. Turn on the PS4 controller by pressing on the Playstation button. Note that the controller must first be charged using a USB-mini cable. The LED on the front of the controller should flash. Put the controller into pairing mode by simultaneously pressing and holding down the Playstation button and the Share button. The LED on the front of the controller should continuously emit quick, strobe-like flashes.
Next, in the Devices sidebar, click on the plus icon in the lower left corner. In the dialog that pops up, choose Input devices(mice,keyboards,etc.) in the Device type drop down. There should now be a single entry labelled Wireless Controller. Click it, and then click Next in the lower right corner. After the dialog reports Successfully set up new device ‘Wireless Controller’, close the Bluetooth dialog.
Note that this can sometimes take a few tries to get it working on the Jetson Nano, so no worries if it didn’t work immediately on the first attempt
Setup Docker & Install MuSHR stack
Now we are going to install MuSHR. Unlike installing Docker on a desktop/laptop computer, some extra steps need to be taken to install on a Jetson Nano/Orin platform.
First off, the nvidia-docker/docker is pre-installed for the specific hardware using the NVIDIA image we provided earlier, but Docker Compose is not. The following steps are what is needed in order to get Docker Compose onto the robot:
$ sudo apt-get update
$ sudo apt-get install curl
$ sudo apt-get install python-pip
$ sudo curl -L "https://github.com/docker/compose/releases/download/v2.17.2/docker-compose-linux-armv7" -o /usr/local/bin/docker-compose
$ sudo chmod +x /usr/local/bin/docker-compose
$ pip install docker-compose
Fortunately, the steps for installing the MuSHR Docker Container on the car are similar to installing the container on a Desktop device. Please follow the section titled Installing MuSHR Docker Container from the noetic quickstart tutorial.
- Installing MuSHR Docker Container
- NOTE: when ask “Are you installing on robot and need all the sensor drivers? (y/n)” respond “y” so that the sensor drivers are installed.
- NOTE: Remember to follow the Linux post install steps to make sure you can run Docker without root privileges.
Unlike simulation, visualization usually is run on a separate computer (though you can install Foxglove on the robot). From the noetic quickstart tutorial complete the following steps on your separate visualization computer.
- Downloading Foxglove Studio
Working with the stack and Launching Teleoperation (manual driving)
Because we are working with docker, there are a few things to note about how to work with the stack.
First, all ROS commands must be run inside a docker container. Docker containers are created via the mushr_noetic command. If you need to create multiple terminal sessions we recommend entering one docker container then using tmux (pre-installed). That way you only need to remember to run mushr_noetic once.
Second, the code itself resides in ~/catkin_ws and is attached to the docker container. This allows you to use your favorite editor and tweak code outside the container. Code edited outside the container will automatically be updated inside the container so there is no need to restart a container.
Teleoperation (manual driving)
Turn on the car and vesc by plugging their batteries in. Turn on the controller and make sure it’s connected to the car (solid light). Enter the docker container.
$ mushr_noeticThen run teleop
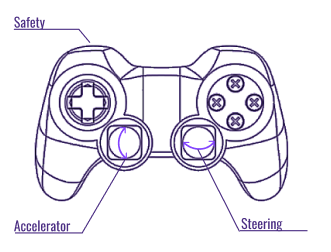
$ roslaunch mushr_base teleop.launchYou should see the lidar spinning and be able to steer with the controller. While holding down the left bumper, use the left joystick to throttle, and the right joystick to turn. See diagram below.
Visualization
After starting up, the robot terminal should print out a line similar to
Rosbridge WebSocket server started at ws://0.0.0.0:9090
In Foxglove, click the top button in the sidebar, labeled Data Source. Then select the Plus button in the left panel. This should open up an interface to connect to data.
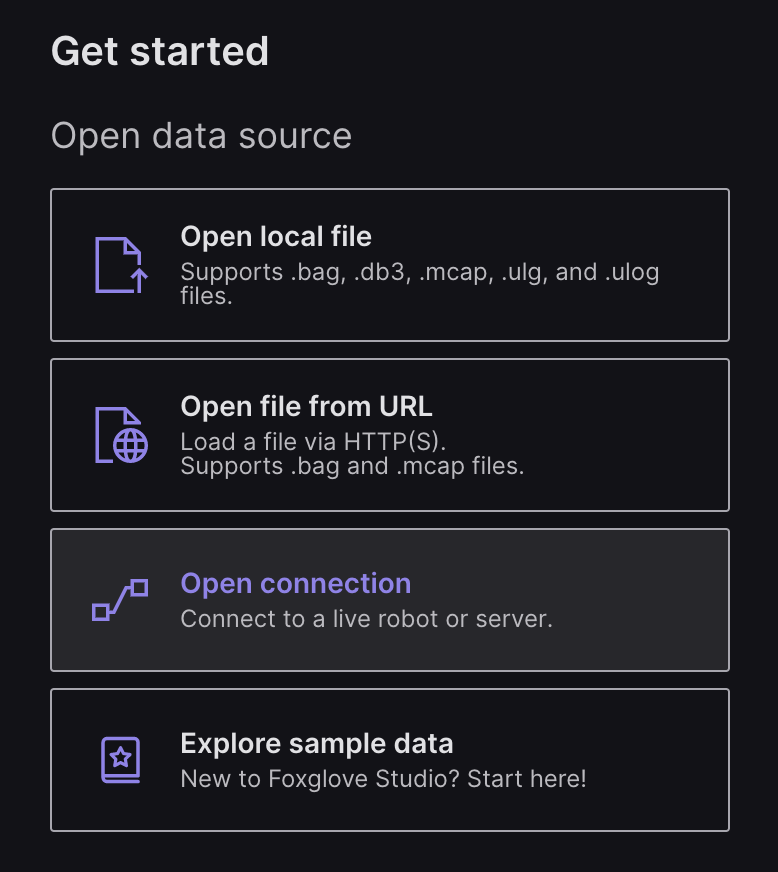
Click the Open Connection button. Select Rosbridge (ROS 1 & ROS 2) as shown below.
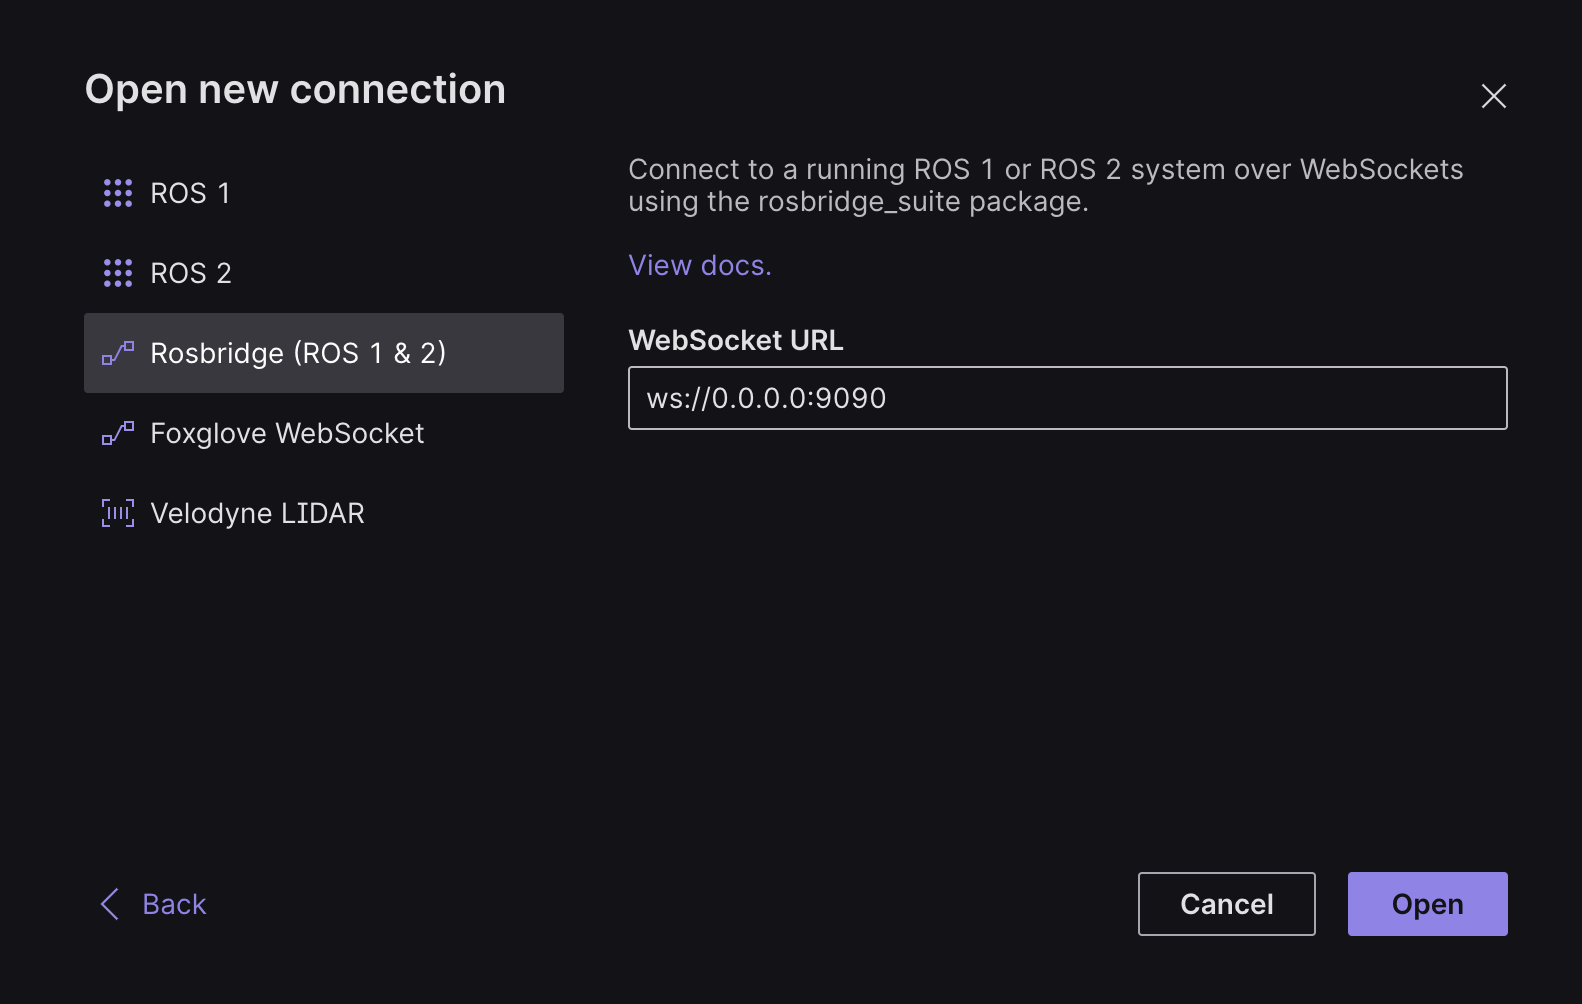
Fill out the WebSocket URL with the robot’s IP and port that the simulator output before. For example if you set your robot’s IP to 172.77.16.27 then it should be ws://172.77.16.27:9090. The IP will differ from the one pictured. Then, click Open in the bottom right corner. The left sidebar should show that a connection has been made.
On the right of the middle panel it will say map. Click on that and switch it to car/base_link. A red laser scan should appear.
Tuning
If your car does not drive in a straight line or you run into other similar issues, please check out the following tuning tutorial.
Next Steps
To learn about programming the car continue to the Intro to ROS Tutorial