Fine tuning car specific control parameters.
Beginner Tutorial | Expected duration is 60 minutes
By: Matthew Rockett
Introduction
The VESC maps input velocities (m/s) and steering angles (radians) to Electrical RPMs and servo positions. Due to small physical differences in the car, the parameters of the conversion need to be tuned to the specific car. This guide will provide you with the steps needed to tune the parameters of the VESC.
If incorrectly tuned, the commands applied by your autonomous controller may not correspond to what’s being executed on the physical hardware, making it difficult to debug issues with the controller. You as a controller turn out to be pretty good at self correcting, but your autonomous controllers may not fair as well.
Note: The conversion from velocity to ERPM and steering angle to servo position is a linear function of the input command:
output = f(command) = gain * command + bias,so the values may not be acurate for large ranges of speeds. Try to tune around the speed you expect to drive at (and consider retuning if your speed regime changes drasically).
Goal
Set the VESC gains (multiplier/strength of an input) and offsets (defualt value when no control is applied).
Requirements
- A computer that can
sshinto your car. - A tape measure.
Setup
Find a relatively open space to run your car. We’ll be driving it straight for ~9ft (3m) and turning in a semi-circle of diameter ~6ft (2m).
Plug the batteries into the car, connect to the car’s network and ssh into the car.
The file will be located at:
~/catkin_ws/src/mushr_base/vesc/vesc_main/config/racecar-uw-nano/vesc.yaml.If you have a different version of the car, you’ll choose that one instead. If you don’t know which car you have, you likely have the racecar-uw-nano version.
The file will look like this:
# erpm (electrical rpm) = speed_to_erpm_gain * speed (meters / second) + speed_to_erpm_offset
#-4614
speed_to_erpm_gain: -2000
speed_to_erpm_offset: 0.0

[...omited for brevity]

# servo value (0 to 1) =  steering_angle_to_servo_gain * steering angle (radians) + steering_angle_to_servo_offset
steering_angle_to_servo_gain: 1.2135
steering_angle_to_servo_offset: 0.55

[...omited for brevity]

vesc_driver:
  port: /dev/vesc
  [...omited for brevity]
Steering Angle Offset
This offset sets the default servo position when the car is driving straight.
How to Tune
You will be changing the variable: steering_angle_to_servo_offset.
Tuning loop:
While the car doesn’t drive straight, do the following procedure:
- Start teleop:
roslaunch mushr_base teleop.launch
- Drive car in a straight line a few times. It’s never going to be perfectly straight, so as long as it goes straight most of the time, it’ll be fine. You can always come back to retune if it’s not sufficiently precise.
- Adjust
steering_angle_offsetinvesc.yaml. Increase the offset if the car veers too much left, decrease if it veers too much right. - Stop teleop (
Ctrl-Cin the window you startedteleop.launchin) and go back to Step 1.
Note: Usually this value is between 0.4 and 0.6
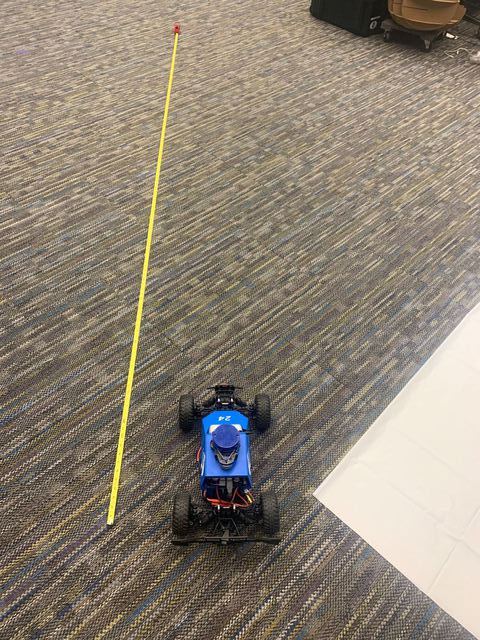
The car during the tuning process. In all tests, the car is commanded to drive straight forward. In the left image, the car's steering angle offset is too high. In the center image, the offset is good. In the right image the offset is too low. Note: the car will never drive perfectly straight. It just has to be good enough. In the future your controller will be able to make small corrections!
Speed to ERPM Gain
This gain converts velocity to ERPM.
How to Tune
You will be changing the variable: speed_to_erpm_gain.
Before tuning:
- Extend your tape measure to around 9-10 ft on the floor. It’s okay if it’s slightly less than this.
Tuning loop:
Now, while the car does not drive the reported distance (by rostopic echo command):
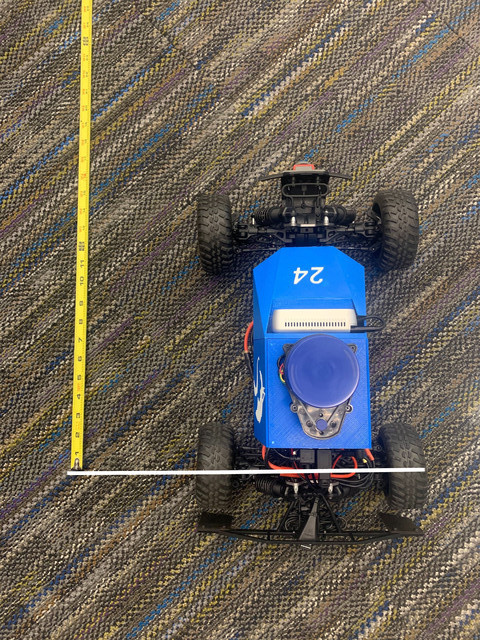
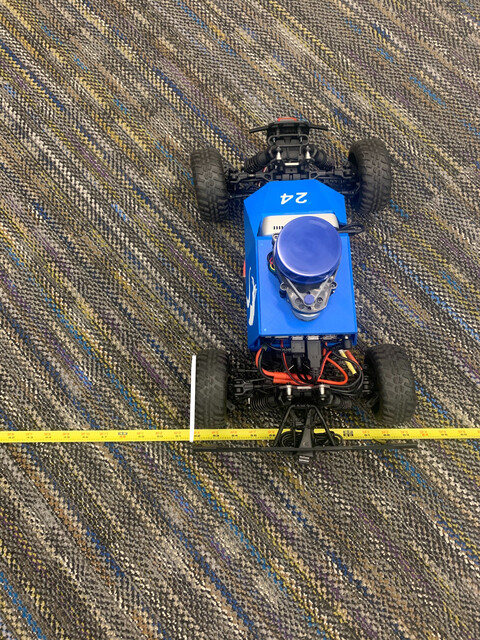
- Place car at the base of the tape measure with the back wheelbase (indicated with a white line) lined up with 0.
- Start teleop.
- Open another terminal on the car and run the command:
rostopic echo /car/vesc/odom/pose/pose/position/x
This will echo all the odometry information – how far the car has driven (in meters) in the x direction since teleop started. The value should be 0.0 at the start, as the car hasn’t moved yet.
- Drive the car forward about 7-8 ft. The car will drive slightly further as it decelerates and stops. Make sure you only drive forward, not altering the servo position, otherwise you’ll have both
xandydirectional changes (which makes it only slightly harder to check distance traveled). - Record the distance traveled. If your tape measure is in inches, convert to meters.
- Compare to output of the
rostopic echocommand’sxvalue. If the reported distance traveled is larger than the actual, decrease the gain. If the reported distance is smaller, increase the gain. At the begining increasing or decreasing by 500 should allow you to quickly hone in on the value. - Stop teleop. Go back to step 1 if the values are not sufficiently close (within 2-3 cm).
Note: This value can vary, but it should be on the order of thousands (2000-5000)
A good stopping criteria is when the reported distance is within 2-3 inches (0.05-0.076m) of the actual distance. Sometimes the servo will get stuck and veer off course. You can restart teleop and move the car back and try again if this happens. Remember we are looking to get “good” gains, not perfect gains.
Steering Angle Gain
This gain takes a steering angle in radians and converts it to a servo position. In order to find the desired turn radius, we look to the kinematic car model. At low enough speeds (avoiding slipping and skidding) this model farily accurately represents the movement of the car. The turn radius is:
where L is the length of the car (0.3 meters), and beta is arctan(1/2 * tan(delta)), where delta is the steering angle. We will be setting the steering angle to the max (0.34 by default).
We will instead the length of a half cirlce, so 2 * R. Calculting this with the defaults, comes out to 1.722 meters (67.79 inches). If you tweak the max steering angle, or change the chassis, you will have to recompute this number.
How to Tune
You will be changing the variable: steering_angle_to_servo_gain.
Before tuning:
- Extend your tape measure to around 7-8 ft on the floor, similar to the tuning procedure above.
Tuning loop:
While the car doesn’t drive :
- Place car at the base of the tape measure with the back wheelbase (indicated with a white line) lined up with 0.
- Start teleop.
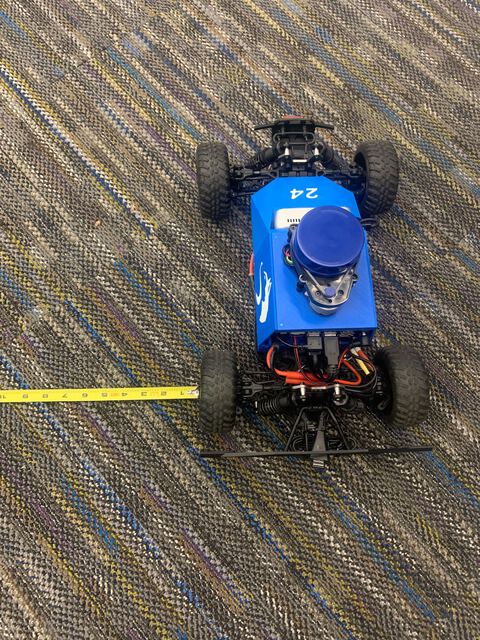
- Command the steering wheel max in whichever direction the measurement tape is. (For the image, it would be left)
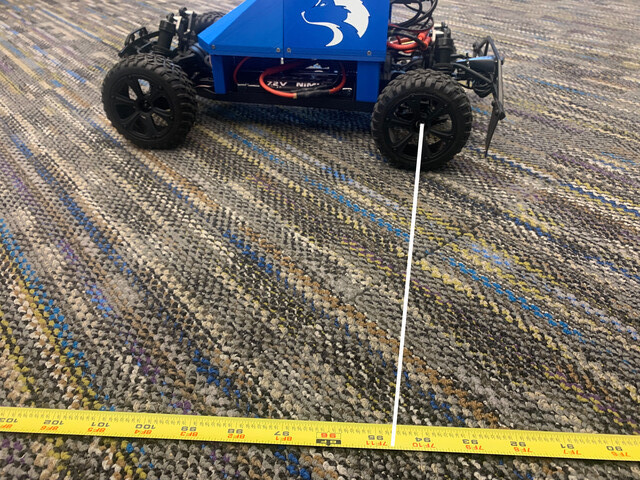
- Run the car such that the car has run over the tape and the back wheel is on the tape (see image). This will take some practice, but you can go slow.
- Record the distance. The goal distance is 1.722 meters (67.79 inches). If it overshot, increase the gain, if it undershot, decrease the gain.
Note: This value should be around 1.1-1.3
Conclusion
With these values, your car should follow input commands much more faithfully.